Once you have the .pfx certificate file, you can use Microsoft Management Console (MMC) to import it into the Active Directory Domain Services Personal Store.
IMPORTING THE .PFX CERTIFICATE FILE
- Open the Microsoft Management Console (MMC) as an admin.
- In the Windows Start menu, in the Search programs and files box, type mmc.
- Right-click on mmc.exe and select Run as administrator.
- In the User Account Control window, click Yes to allow the program to make changes to the computer.
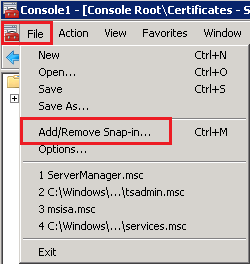
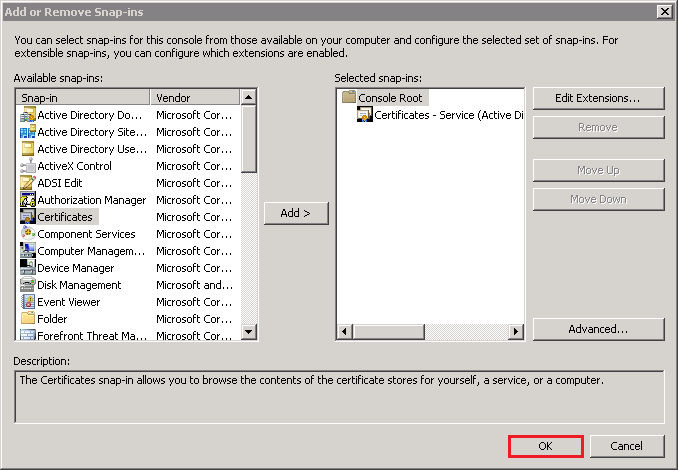
- In the MMC Console, click File > Add/Remove Snap-in.
- In the Add or Remove Snap-ins window, under Available snap-ins, select Certificates and then, click Add.

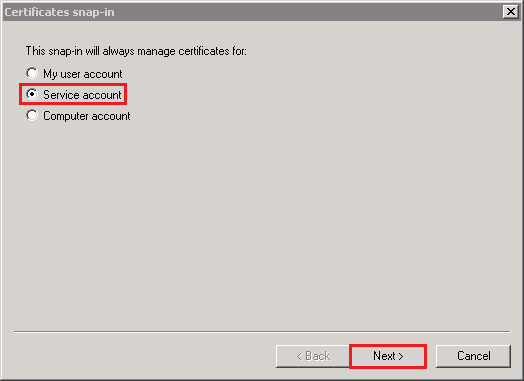
- In the Certificates snap-in window, select Service account and then, click Next.
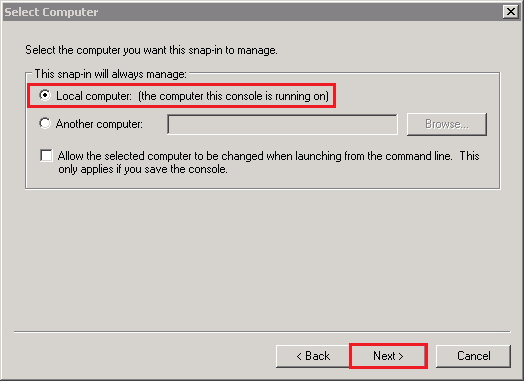
- In the Select Computer window, select Local computer: (the computer this console is running on) and then, click Next.
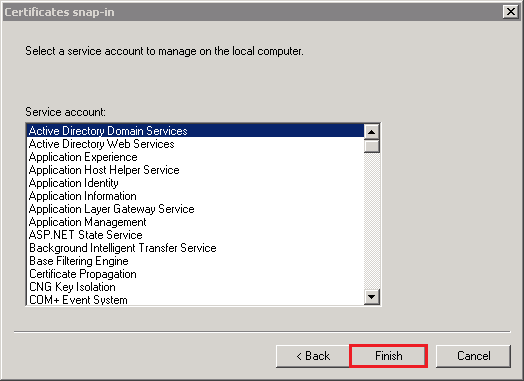
- In the Certificates snap-in window, select Active Directory Domain Services and then, click Finish.
- In the Add or Remove snap-ins window, click OK.
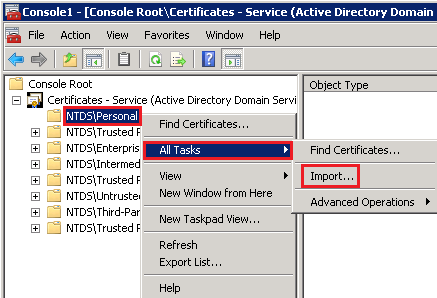
- In the MMC Console, in the console tree, expand Certificates – Service (Active Directory Domain Services), right-click on NTDS/Personal, and select Import.
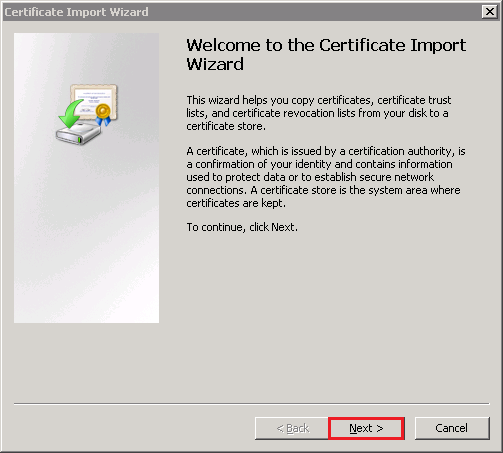
- In the Certificate Import Wizard, on the Welcome to the Certificate Import page, click Next.
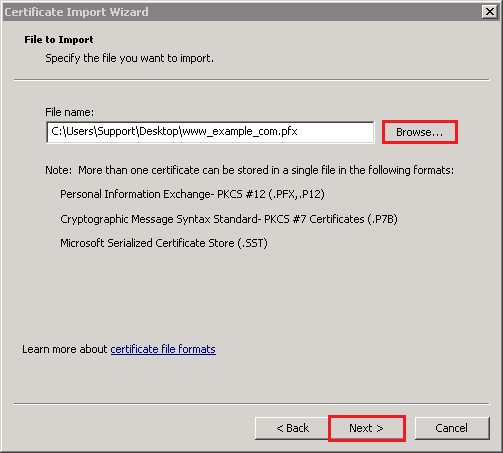
- On the File to Import page, click Browse to browse for and select the .pfx certificate file (e.g. your_domain_com.pfx) that you exported using the DigiCert Certificate Utility, select the file, click Open, and then, click Next.
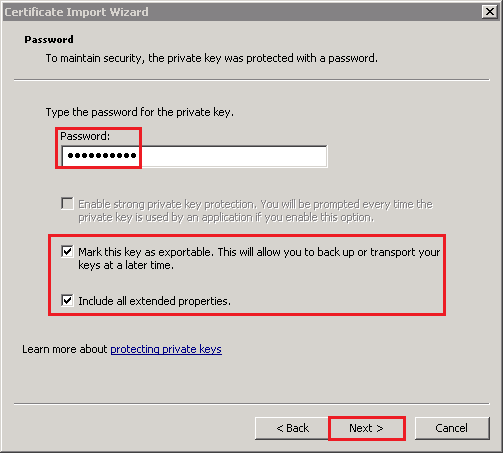
- On the Password page, do the following:
- In the Password box, enter the password that you created when you exported the .pfx certificate file.
- Check Include all extended properties.
- Check Mark this key as exportable.
- Click Next.
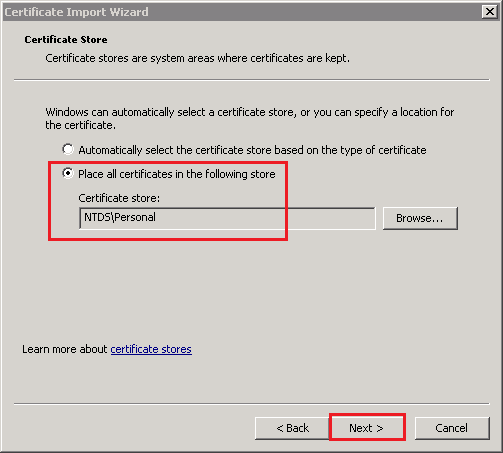
- On the Certificate Store page, leave the default settings and click Next.Default Settings:
- Place all certificates in the following store
- Certificate store: NTDS\Personal
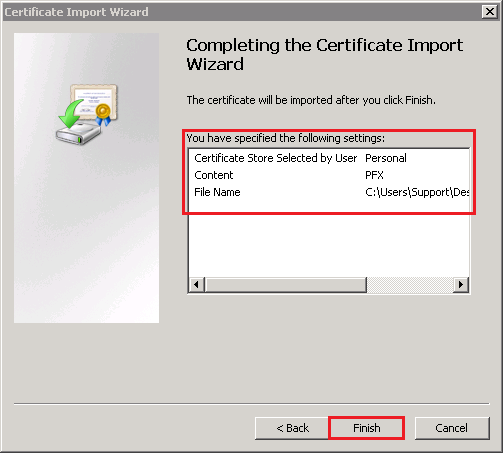
- On the Completing the Certificate Import page, review your settings and then, click Finish.
- All your client computers should now be able to make SSL connections to all your domain controllers in the forest.
VERIFY SSL WAS SUCCESSFULLY CONFIGURED
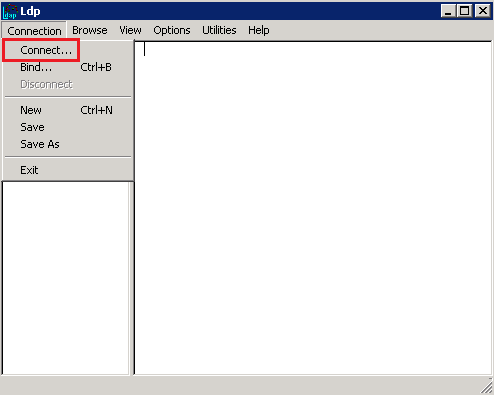
- Open the LDP snap-in as and admin.
- In the Windows Start menu, in the Search programs and files box, type ldp.
- Right-click on ldp.exe and select Run as administrator.
- In the User Account Control window, click Yes to allow the program to make changes to the computer.
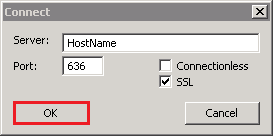
- In Ldp, click Connection > Connect.
- In the Connect window, do the following:
- In the Server box, enter the hostname of to which you are connecting.
- In the Port box, enter 636.
- Check SSL.
- Uncheck Connectionless.
- Click OK.
- The command output should display the user name and the domain name for the binding.
- If you receive the Cannot open connection message, LDAP-over-SSL binding is not configured properly.
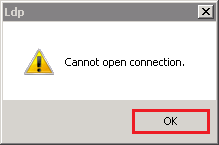
- Click OK.
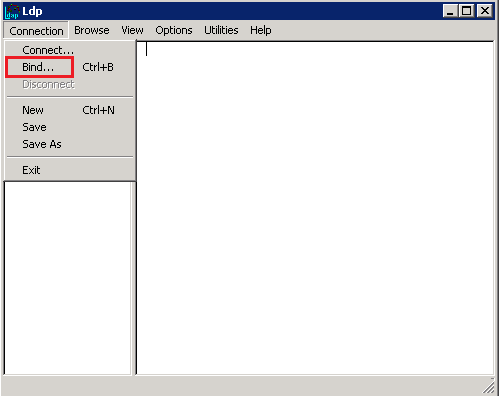
- Next, in LDP, click Connection > Bind.
- In the Bind window, click OK.
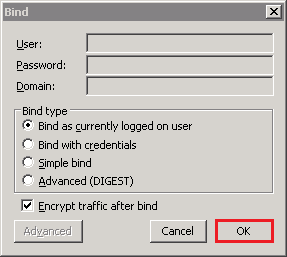
- The command output should now display the user name and the domain name for the binding.
Next Tech Document
TECH DOCUMENTSEP 26, 2018
How to Install SSL Certificates on Microsoft Active Directory LDAP 2012